
Shido IBC Transfer
In this tutorial, I used the Keplr Wallet Chrome Extension! The Shido chain is already added to the Keplr wallet, which is very easy to do if you haven’t done it yet. Add the chain via
After adding the chain, you need to make it visible via ‘Manage Chain Visibility.
So First Enable Developer mode in the Keplr Extension
Open the KEPLR extension, on the bottom click Settings, click Advanced, and Turn on the Developer Mode.
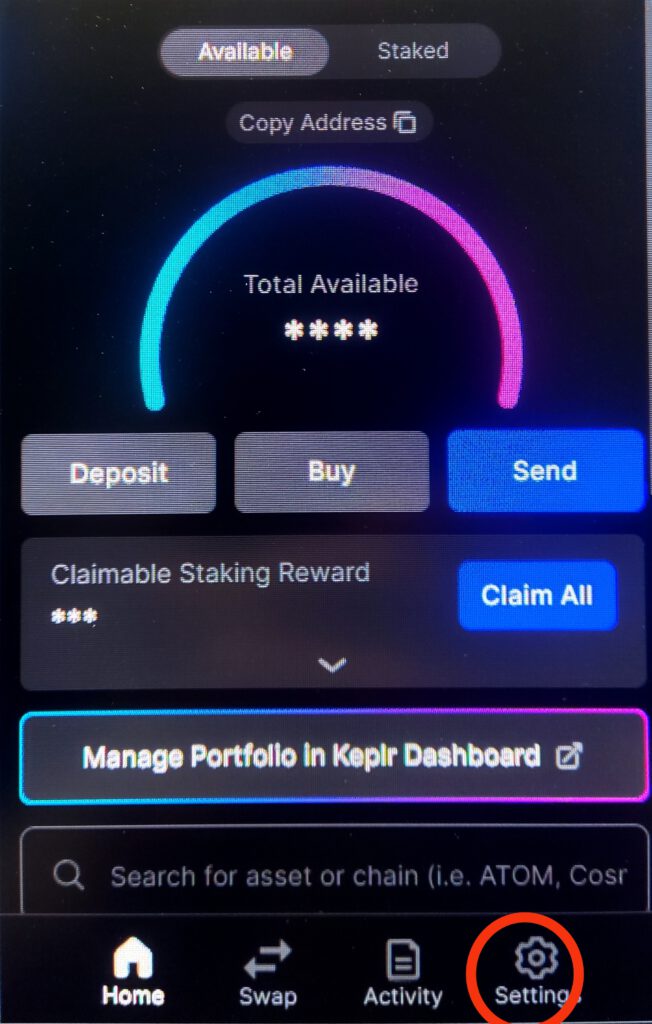
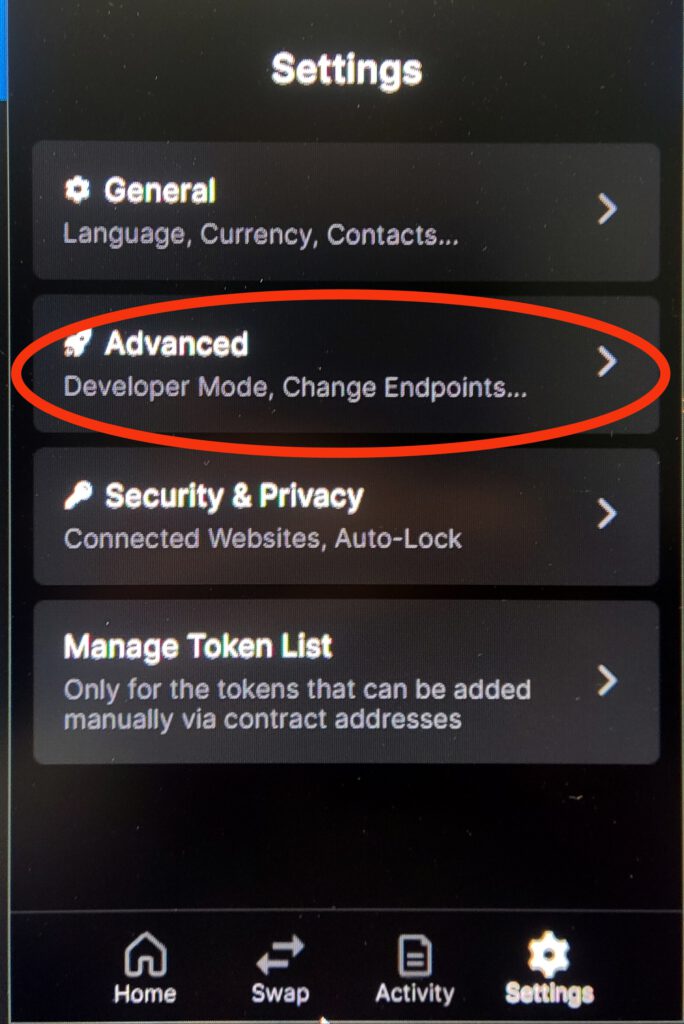
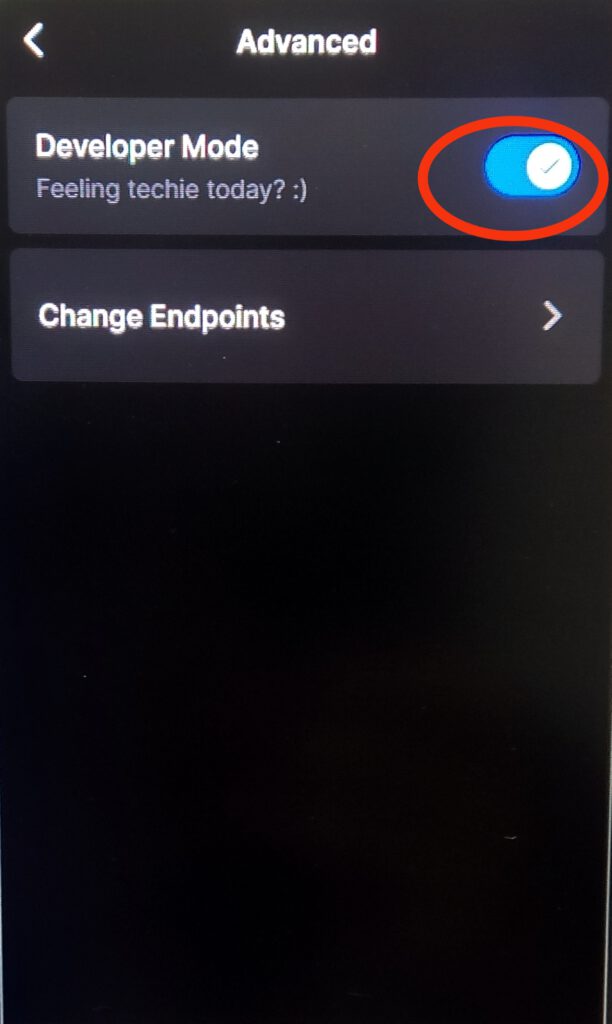
Lets Set up The Shido IBC Channel
Now, open the KEPLR extension and scroll down to the bottom to find ‘Advanced IBC Transfer.’
Click “Transfer”, then select SHIDO IBC.
In the Destination Chain section, click “New IBC Transfer Channel”, choose Shido from the dropdown menu, enter 73755 in the Source Channel ID field, and click “Save”
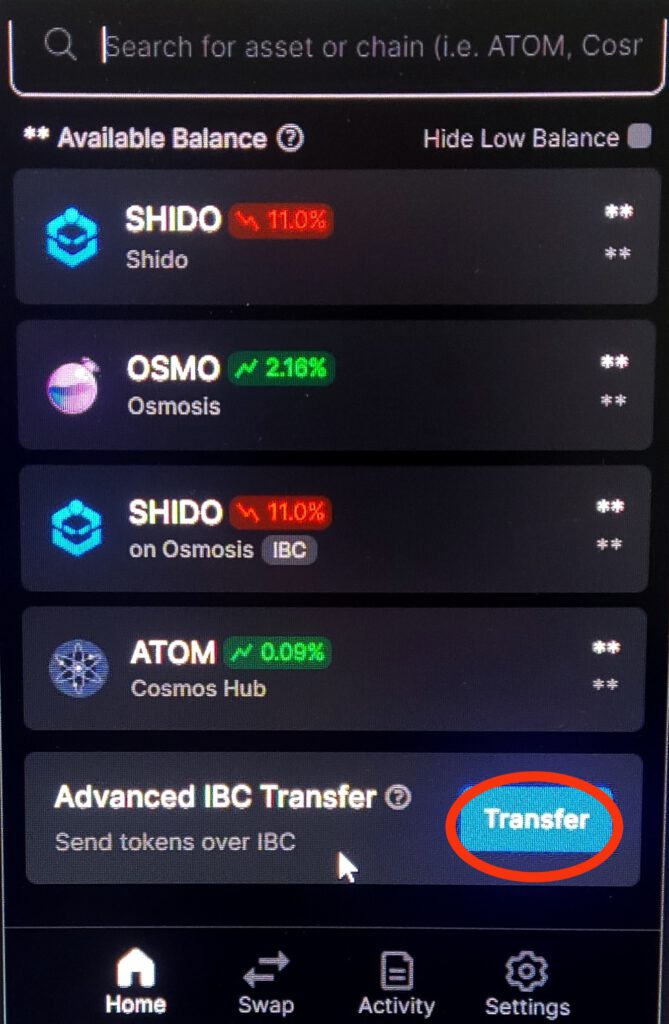
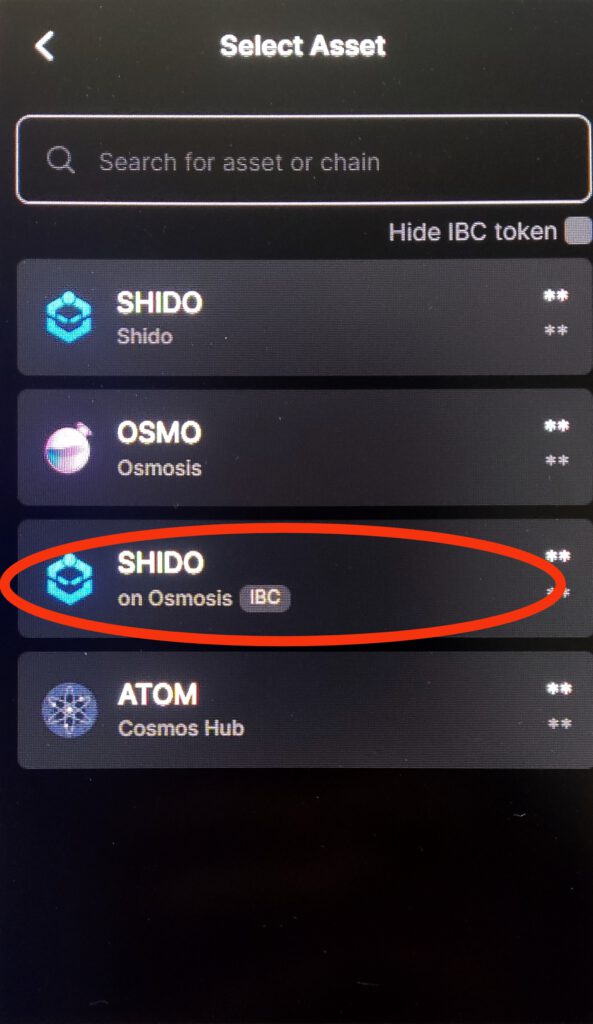
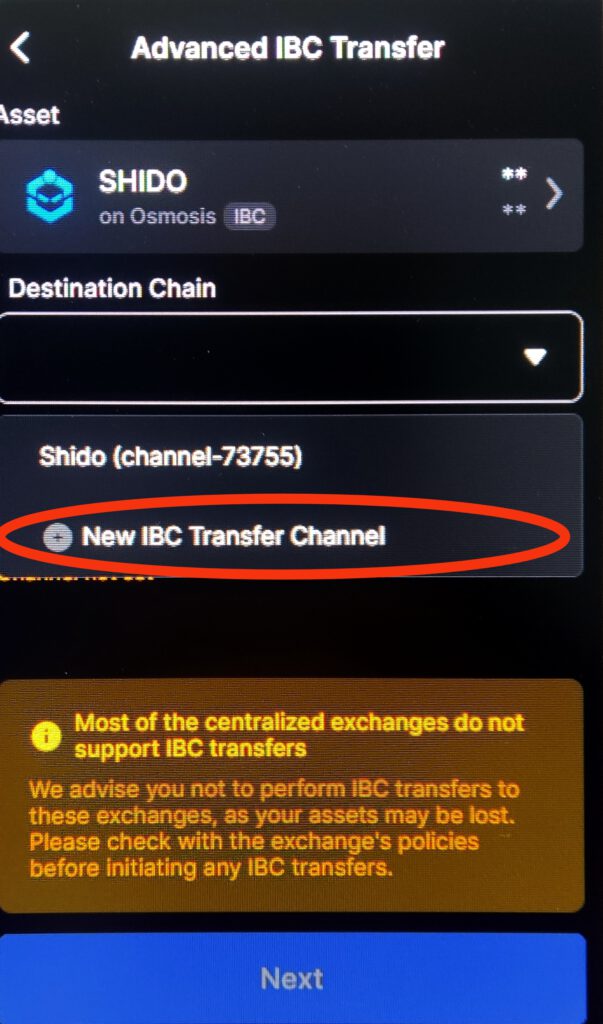
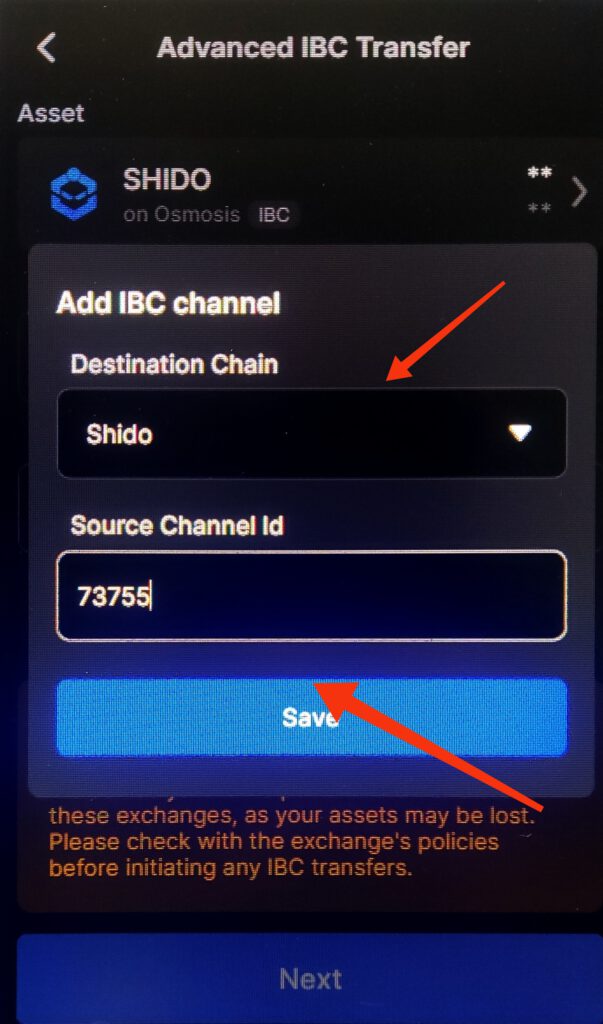
Lets Tranfer it to the Shido Chain
Next, select Shido (channel-73755) as the Destination Chain. In the Address field, enter the SHIDO address (You can copy your Shido address from the Keplr extension home/balance screen! It starts with shido****), then click “Next”.
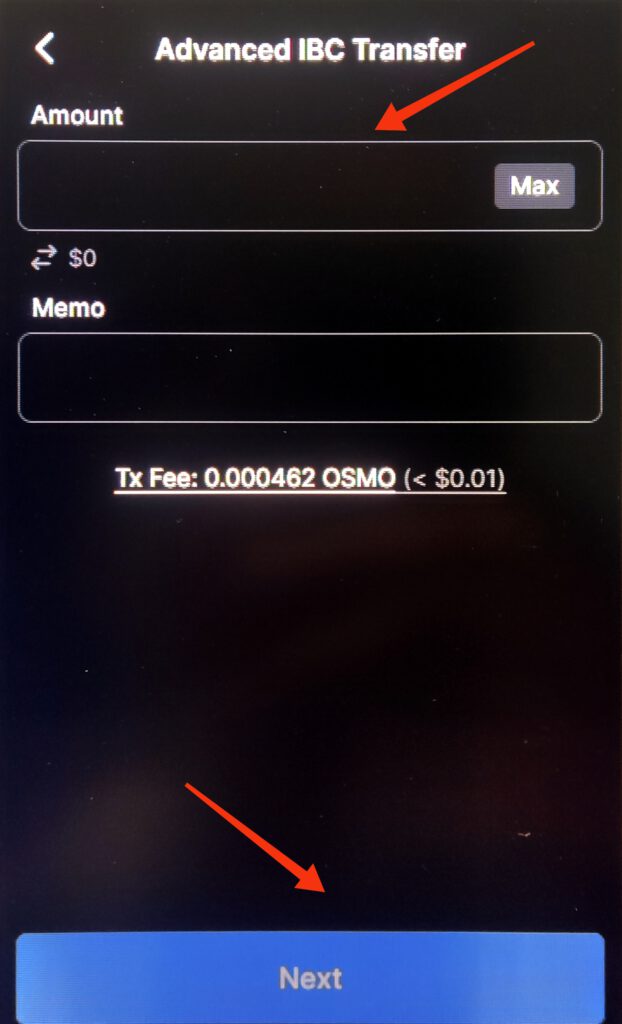
Input the amount of SHIDO IBC you want to send to the SHIDO Mainnet in the “Amount” field, and then click “Next”
(It might be wise to start with a small amount of Shido to see if it works correctly. If successful, you can swap the rest.)
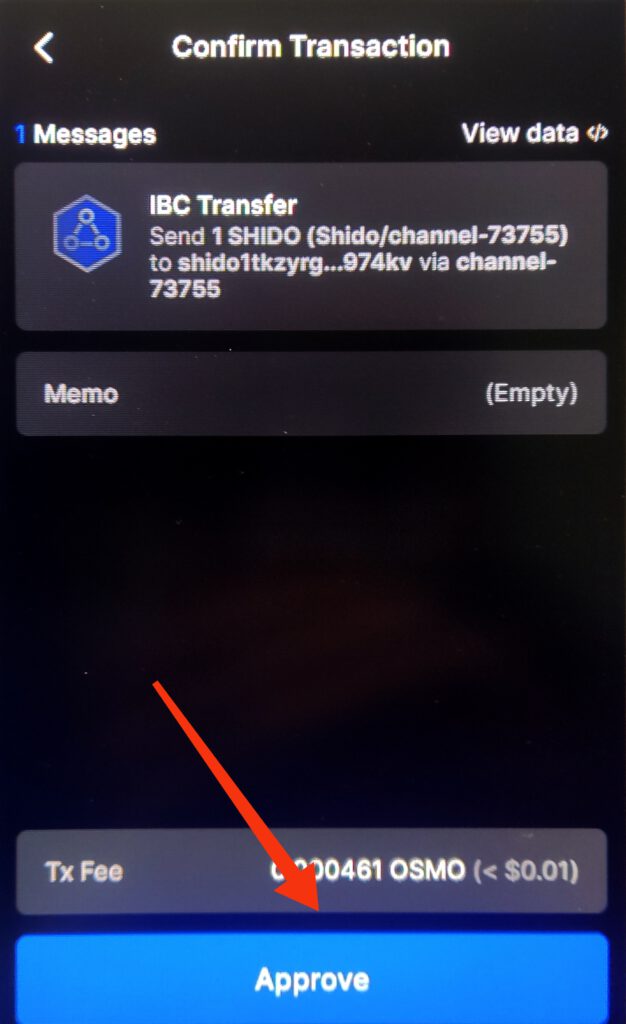
On the transaction confirmation screen, review the details of your transaction. Click “Approve” to finalize the transaction
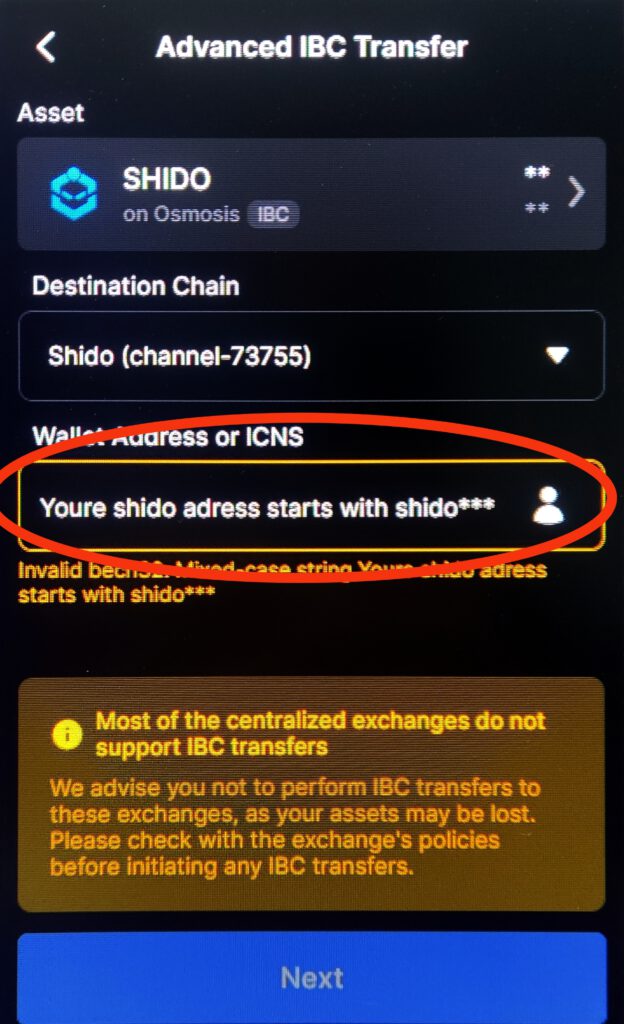
Be aware that most centralized exchanges do not support IBC transfers. Therefore, do NOT send IBC transfers to any centralized exchange addresses.
That’s it! You have now successfully transferred SHIDO IBC to the SHIDO mainnet.
For more tutorials check out Online-Vermogen.com
